OpenVPN server on Turris⚓︎
What is OpenVPN?⚓︎
OpenVPN is an open technology for virtual private networks. It works on the client-server principle – multiple clients connect to an OpenVPN server to get access to a regularly inaccessible network. For example, you can access computers in your home or office LAN from your laptop connected to any Internet connection.
The access is authenticated (only permitted clients can connect to the server) and encrypted (nobody can read the communication between the client and the server). Additionaly, your Internet traffic can be routed via the OpenVPN connection (this is useful e.g. if your company’s servers may be accessed only from the company’s LAN).
Important
You can use your Turris as an OpenVPN server only if it is accessible from the Internet (it has a public IP address or at least the OpenVPN port is forwarded to it).
How to set up OpenVPN server in reForis⚓︎
This manual describes how to set up OpenVPN in a few easy steps using reForis:
1. Install the OpenVPN package⚓︎
Log into the reForis user interface and go to the Package Management → Packages tab. Check the box next to OpenVPN. Then press Save changes.

2. Check that the package was installed⚓︎
Go to the Notifications tab and refresh the browser, you should see all the installed packages and some with “openvpn” among them.

3. Reboot your router using reForis⚓︎
Go to the Administration → Maintenance tab and press Reboot.

4. Generate certification authority⚓︎
Once the router has rebooted, refresh the page and log back in. There should now be a new menu subtree: OpenVPN. Click to it to expand its items and then click to Server Settings.

Press the Generate CA button now. It might take up to 30 minutes to generate the certificate authority, but this isn’t a process that we can speed up in any way (it requires to get enough entropy for good security).

5. Enable OpenVPN server⚓︎

By switching the Server enabled switch on and pressing Save you let the plugin create a simplified VPN configuration. If you have already had your configuration (from your use of OpenVPN in the past) it is filled into the form. Otherwise the plugin creates a default configuration for you.
Warning
After you click Save, you can temporarily lose connection to your router, you just need to refresh the page or wait a moment.

In most cases you don’t need to change any of the settings. There are these configuration parameters:
- Listen on IPv6 – Leave unchecked only if your IPv6 connection is broken.
- Protocol – Change only if your ISP limits UDP transmission (this practice is defective by nature but some ISPs even do so).
- VPN network address – Leave unchanged in all common cases. If your network (either LAN or WAN) uses addresses from the range 10.111.111.0-254 (in other words, 10.111.111.0/24 or 10.111.111.0/255.255.255.0) you will need to use another network address (e.g. 10.99.98.0) for VPN; it must not be used in your network. Use only addresses intended for private networks. The network mask must correspond to the address range you use and be 255.255.255.248 or shorter. For example, 255.255.255.0 – the default mask – is for addresses ending with .0 to .254. You can find more information e.g. on Wikipedia. The VPN server has always an address ending with
.1(e.g. 10.99.98.1 for the 10.99.98.0 network mentioned above). - VPN network mask – See the information above.
- Route all traffic via VPN – Check only if you want all your traffic to the Internet to be routed over your VPN. For example, you need to connect to your servers which can be accessed only from the address of your router.
- Use DNS from VPN – Check only if you need to use the DNS on your router. For example, your router is connected to a community network which has private servers and their domain names are not propagated to the public Internet.
Important
Device and Port fields are only informative and cannot be changed. Their values will be assigned on the first save (they have no sense before).
Note
If something is not working as it should or you would like to extend the OpenVPN configuration, please write your suggestions here.
6. Client configuration⚓︎
For each client you need to generate a separate file, which the user will load into his OpenVPN client. Here you can just add the name of the client (this serves as a note to yourself). Go to the OpenVPN → Client Registration tab, write the name of the client into the Client name field and press the Add button.
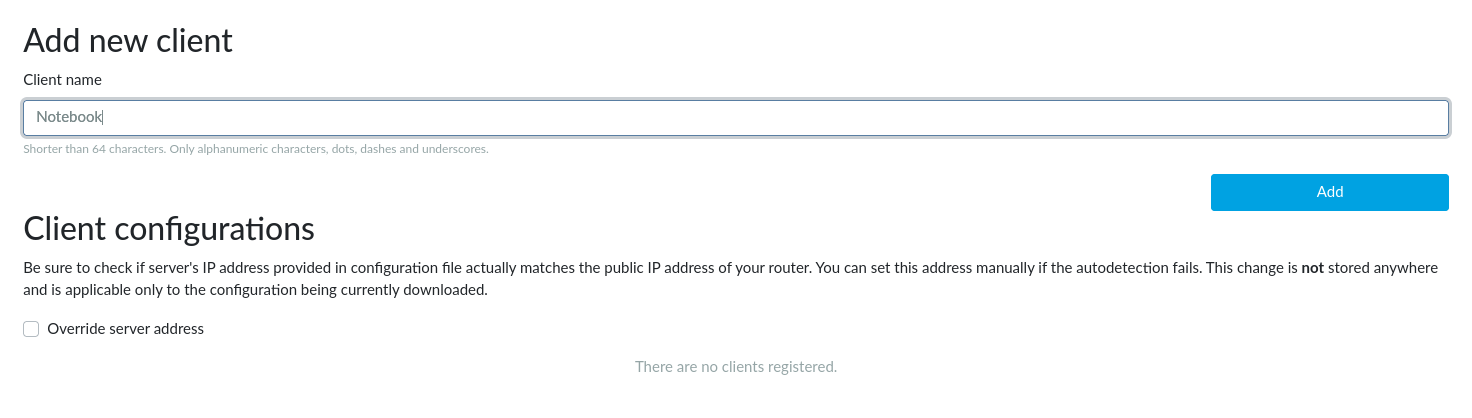
The configuration file is generated within a few minutes. This again is an encryption process, which cannot be sped up. Reload the current page to see whether this process has been finished.
Once the file is generated it can be downloaded using the Download button. Unwanted clients can be removed by pressing the Revoke button. This drops the client’s permission to connect to the OpenVPN server.
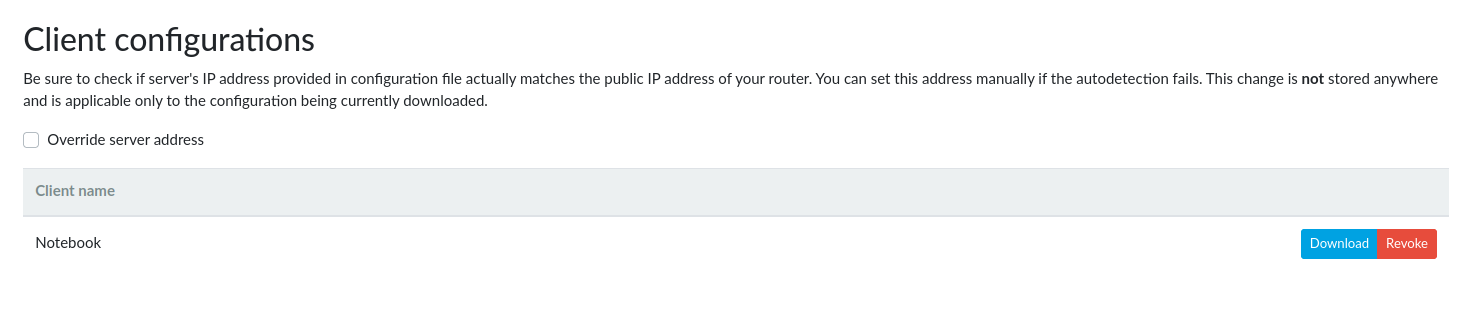
If your router has only a private WAN address but is accessible via a public address (a 1:1 NAT is used or the OpenVPN port is forwarded through the NAT) please check the Override server address checkbox and fill the Router’s public IPv4 address field. This must be set before you download the client configuration files.
Setting up OpenVPN on the client side⚓︎
At this point you need to select and download a client for your platform, if you don’t already have one. The OpenVPN client is available for all possible platforms, you just need to find a manual for yours to set it up correctly.
How to set the client side on various platforms:
Tip
If you want to setup your Turris as an OpenVPN client, please read OpenVPN client.