Storage plugin⚓︎
Turris Omnia contains a soldered eMMC flash memory chip which is used as the system storage. It holds both the Turris OS itself and the created data. But if you want to use applications which need to save larger amounts of data you can use an external storage device.
The same applies to Turris 1.0 and 1.1 as well. Turris MOX (and Turris Shield) uses a microSD card instead, but it has properties very similar to the soldered flash memory.
Tip
If you want to use Nextcloud, LXC, or other I/O intensive applications, don’t put them on the internal flash. Always use external storage as internal flash could be easily destroyed by I/O intensive applications! You can recognize such applications by External storage label, which you can see in the Packages tab. Also, please make sure that your data will fit on the new drive before switching.
The storage plugin allows you to easily move your /srv to an external drive. It both allows getting more space and lengthen the lifespan of the internal eMMC flash storage. The /srv directory is used for storing site-specific data as defined in the FHS specification. The storage plugin can’t move other parts of the file system. But it doesn’t matter because all data-intensive applications save their data into /srv.
First setup⚓︎
Pick an external storage device, which you want to move your persistent data to. It can be, for example, a simple USB flash drive, but it is strongly encouraged to use a regular HDD or SSD to get both higher speed and better durability.
Warning
Setting up external storage will destroy all data on newly selected storage. Make sure that the storage device has no important data on it.
In case of a USB drive, insert it into the USB slot on your router. If you are using a different type of storage, make sure that it is properly inserted or connected to the router.
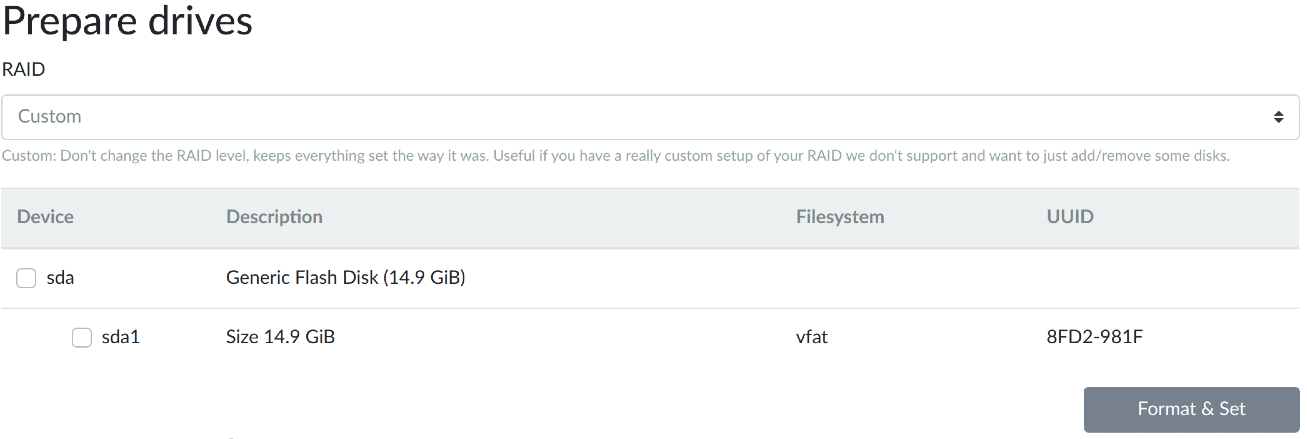
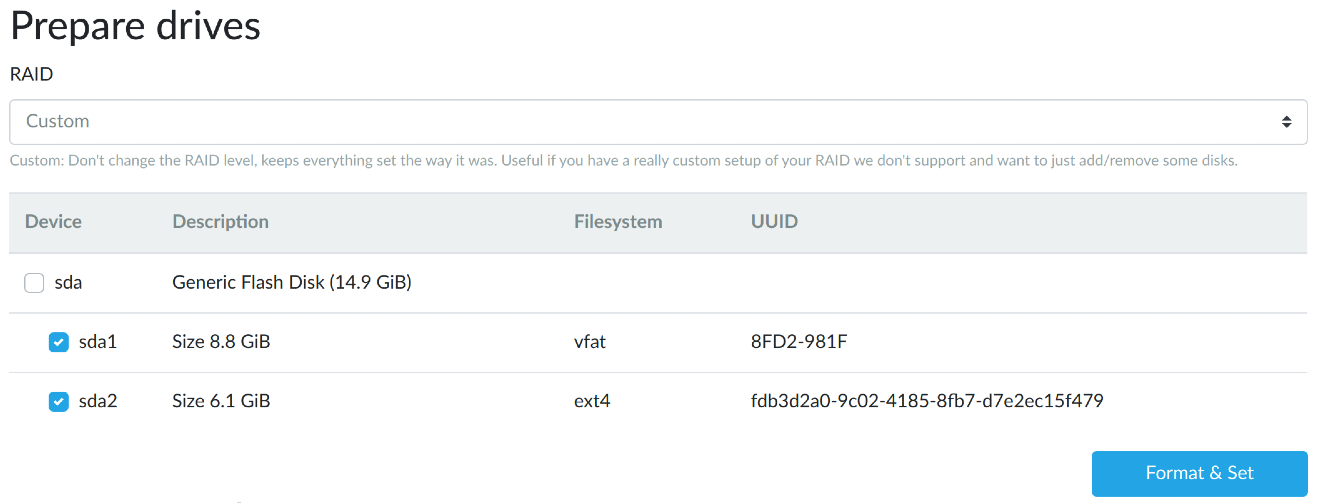
Once the external storage is inserted, inside the Storage tab in reForis in the Prepare drives section, select where your persistent data should be stored and press the Format & Set button.
Info
More than one device may be selected.
You will be asked if you are ready to continue. Then press Continue. Now, wait until formatting is finished. For applying the changes, you need to reboot your system.
You can do this by going to the Notifications on the Overview tab or Notifications dropdown and pressing Reboot.
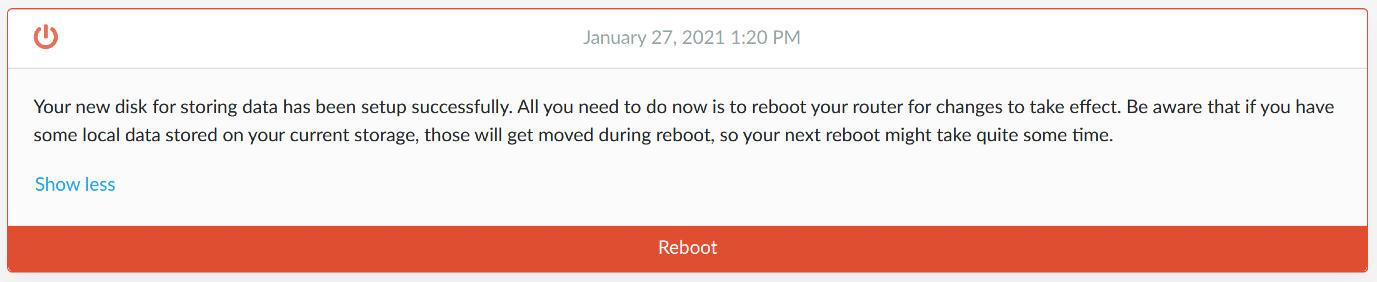
The reboot might take a long time because it involves the transfer of your data to the new storage.

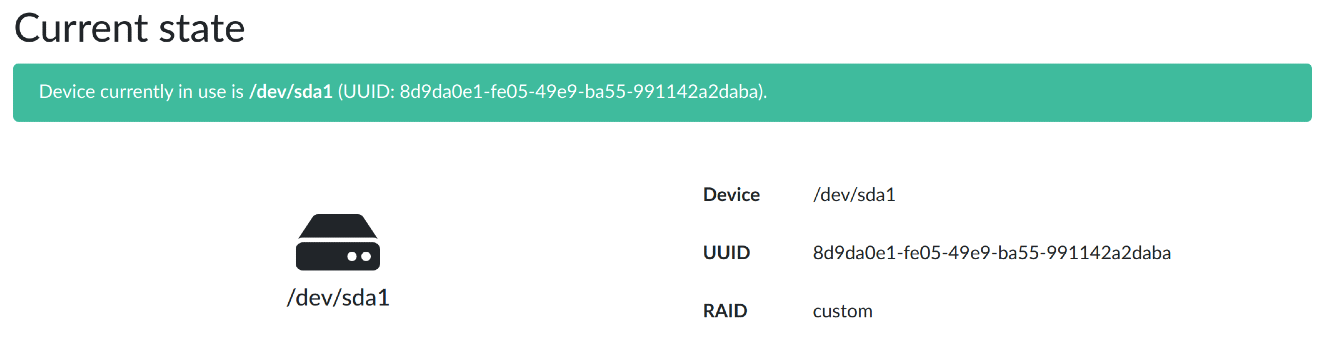
Once the process is finished, you have rebooted your router and logged back into reForis, the selected storage will be highlighted blue with a green alert. This means that the operation was successful and your data will from now on be written to the external disk.
Multiple drives⚓︎
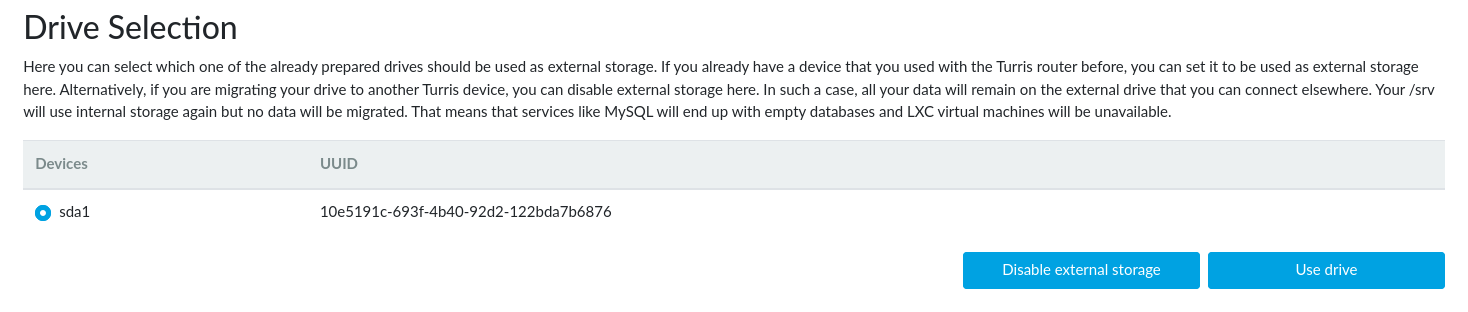
You can add additional drives anytime you need more space or redundancy. Simply select an additional drive in the web interface.
Data on the newly selected drive will be deleted. Data on old drives will be spread across all enabled drives.
If you have more drives and want to remove/replace some of them, do so by unchecking them in in the Web UI and hitting the Format & Set button. Removing a drive takes a long time as data need to be moved out of it first.
Tip
No additional reboot is needed to extend/shrink your storage. Actually quite opposite – everything happens at runtime, so avoid reboot till you get a notification that everything is successfully finished.
Data redundancy⚓︎
By default, adding more drives will increase the capacity available in /srv. If you are using your router to store important data, you might want to set redundancy for your drives.
Valid options are the following:
raid1– every piece of data is kept on two different drives (no matter how many drives you have), so if one drive fails, you can still get to your datasingle– there is only one copy of data – more space, but not redundancycustom– the RAID level is unchanged and only rebalance is done after adding/removing the drive
In the Prepare drives section choose the option you want (in the RAID drop-down list) and the click Format & Set button.
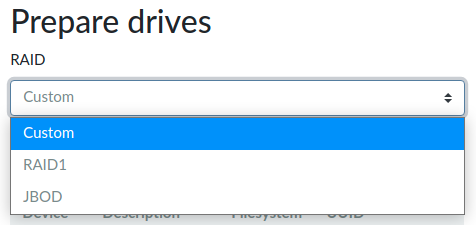
There are the following options:
- Not specified – RAID level is unchanged and only rebalance is done after adding/removing drive.
- RAID1 – every piece of data is kept on two different drives (no matter how many drives you have), so if one drive fails, you can still get to your data.
- JBOD – there is only one copy of data – more space, but not redundancy.
Then after hitting the Format & Set button without changing any drives, the RAID level will be set and data rearranged.
CLI alternative
Advanced users can do it also in CLI by calling the following commands:
uci set storage.srv.raid=raid1
uci commit storage
Valid options for storage.srv.raid are the following:
raid1– every piece of data is kept on two different drives (no matter how many drives you have), so if one drive fails, you can still get to your datasingle– there is only one copy of data - more space, but not redundancycustom– the RAID level is unchanged and only rebalance is done after adding/removing the drive