Serial connection⚓︎
Warning
This tutorial is mainly for advanced users. You can damage your router if you make a mistake.
The router has a serial link which can be used to control the router and monitor error reports. It also displays the booting progress and it doesn’t require networking to be set up properly.
Hardware⚓︎
Turris MOX⚓︎
Warning
The UART cable for Turris MOX requires 1.8V logic. Most common UART cables are 3.3V or 5V. Make sure you have correct cable before connecting it, otherwise you will permanently damage your router!
The pins for UART are exposed on GPIO header. Following pins can be used to access UART:
| Pin | Signal | UART cable |
|---|---|---|
| 5 | GND | black wire |
| 6 | +1V8 | red wire – only if needed |
| 13 | RX | white wire |
| 14 | TX | green wire |
Take extra care when connecting the red wire. On some cables, this is directly connected to +5V USB power. If that is the case, connecting it will fry the MOX. However on some cables like 6-wire USB cable supplied in some hacker packs, the red wire powers the cable itself and has to be connected to a +1V8 pin.
If you have PoE addon, you can find pins on addon itself. In this case it is:
| Pin | Signal | UART cable |
|---|---|---|
| 1 | GND | black wire |
| 2 | +1V8 | red wire – only if needed |
| 7 | RX | white wire |
| 8 | TX | green wire |
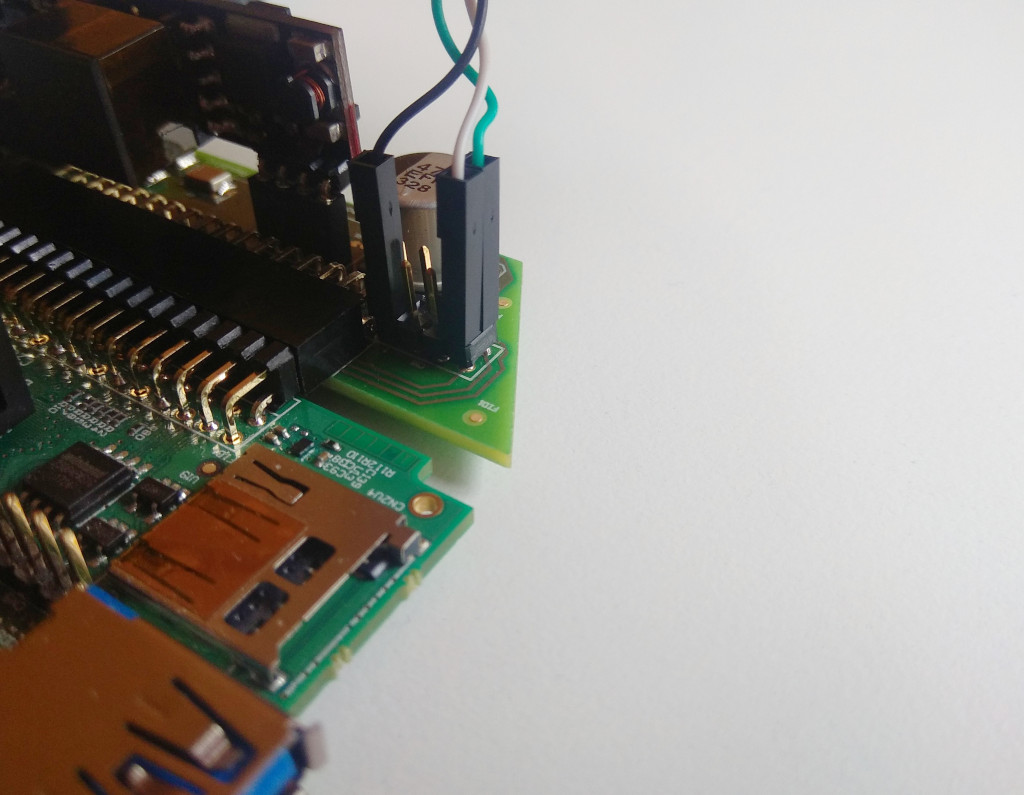
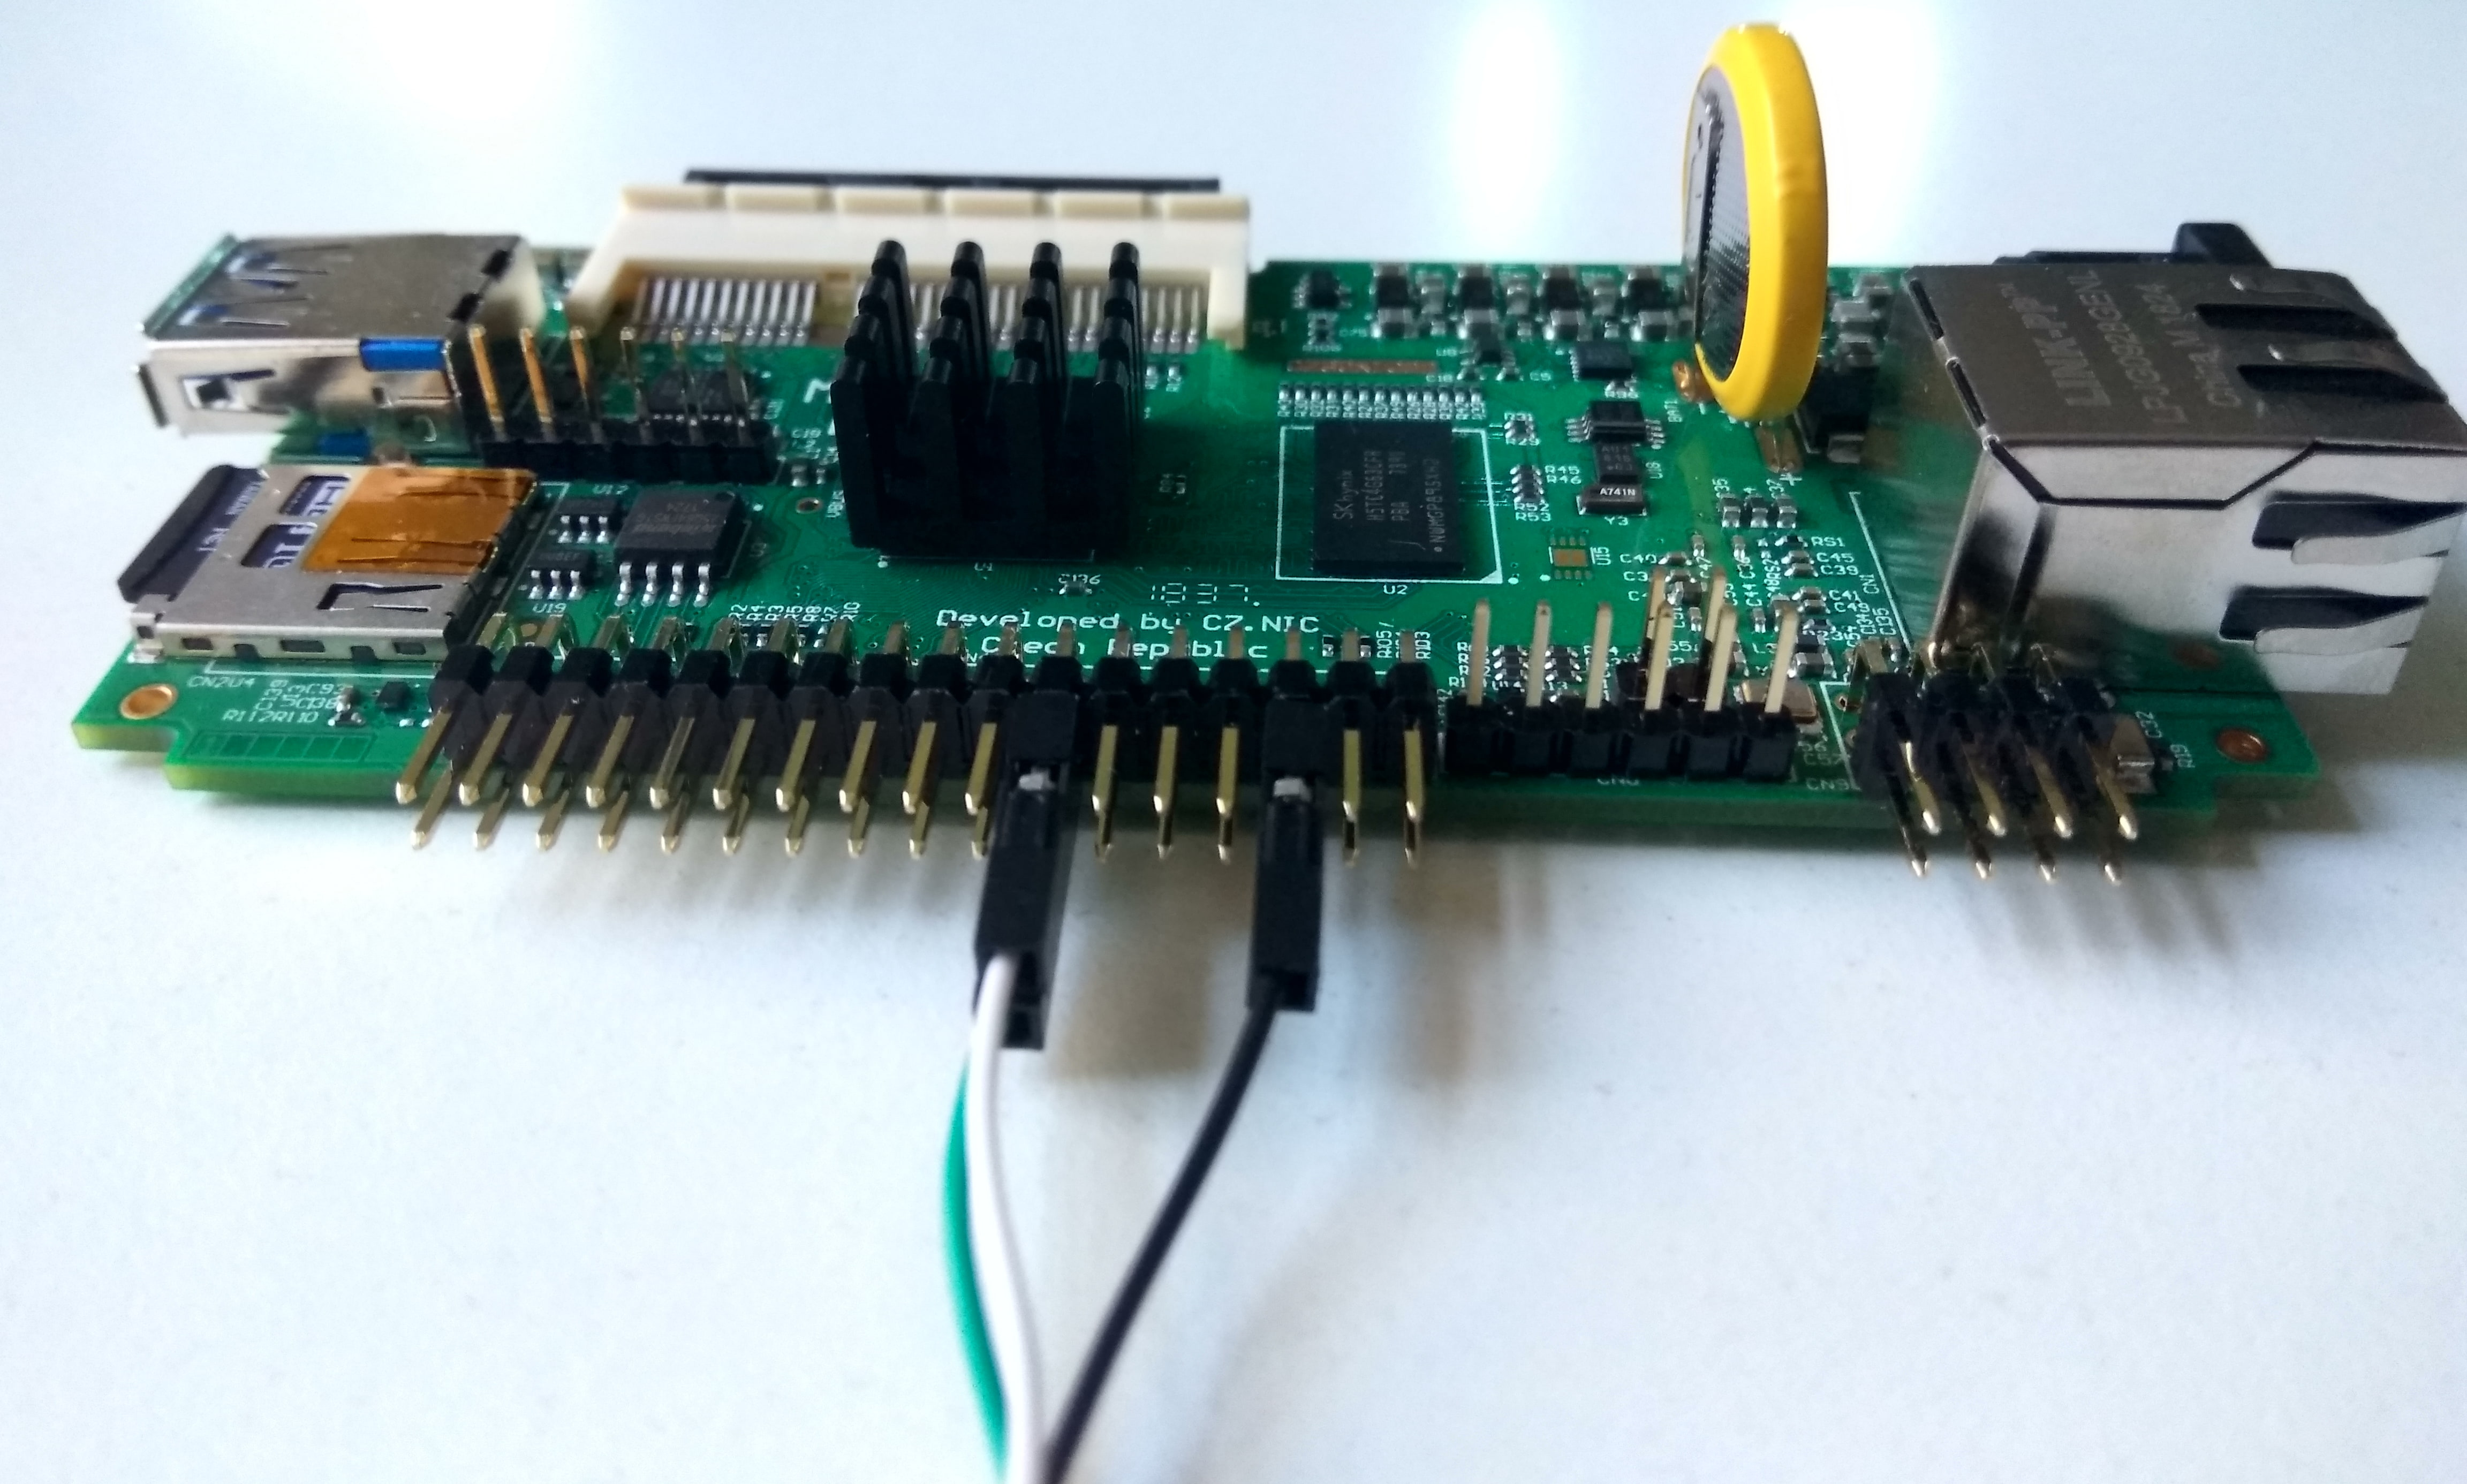
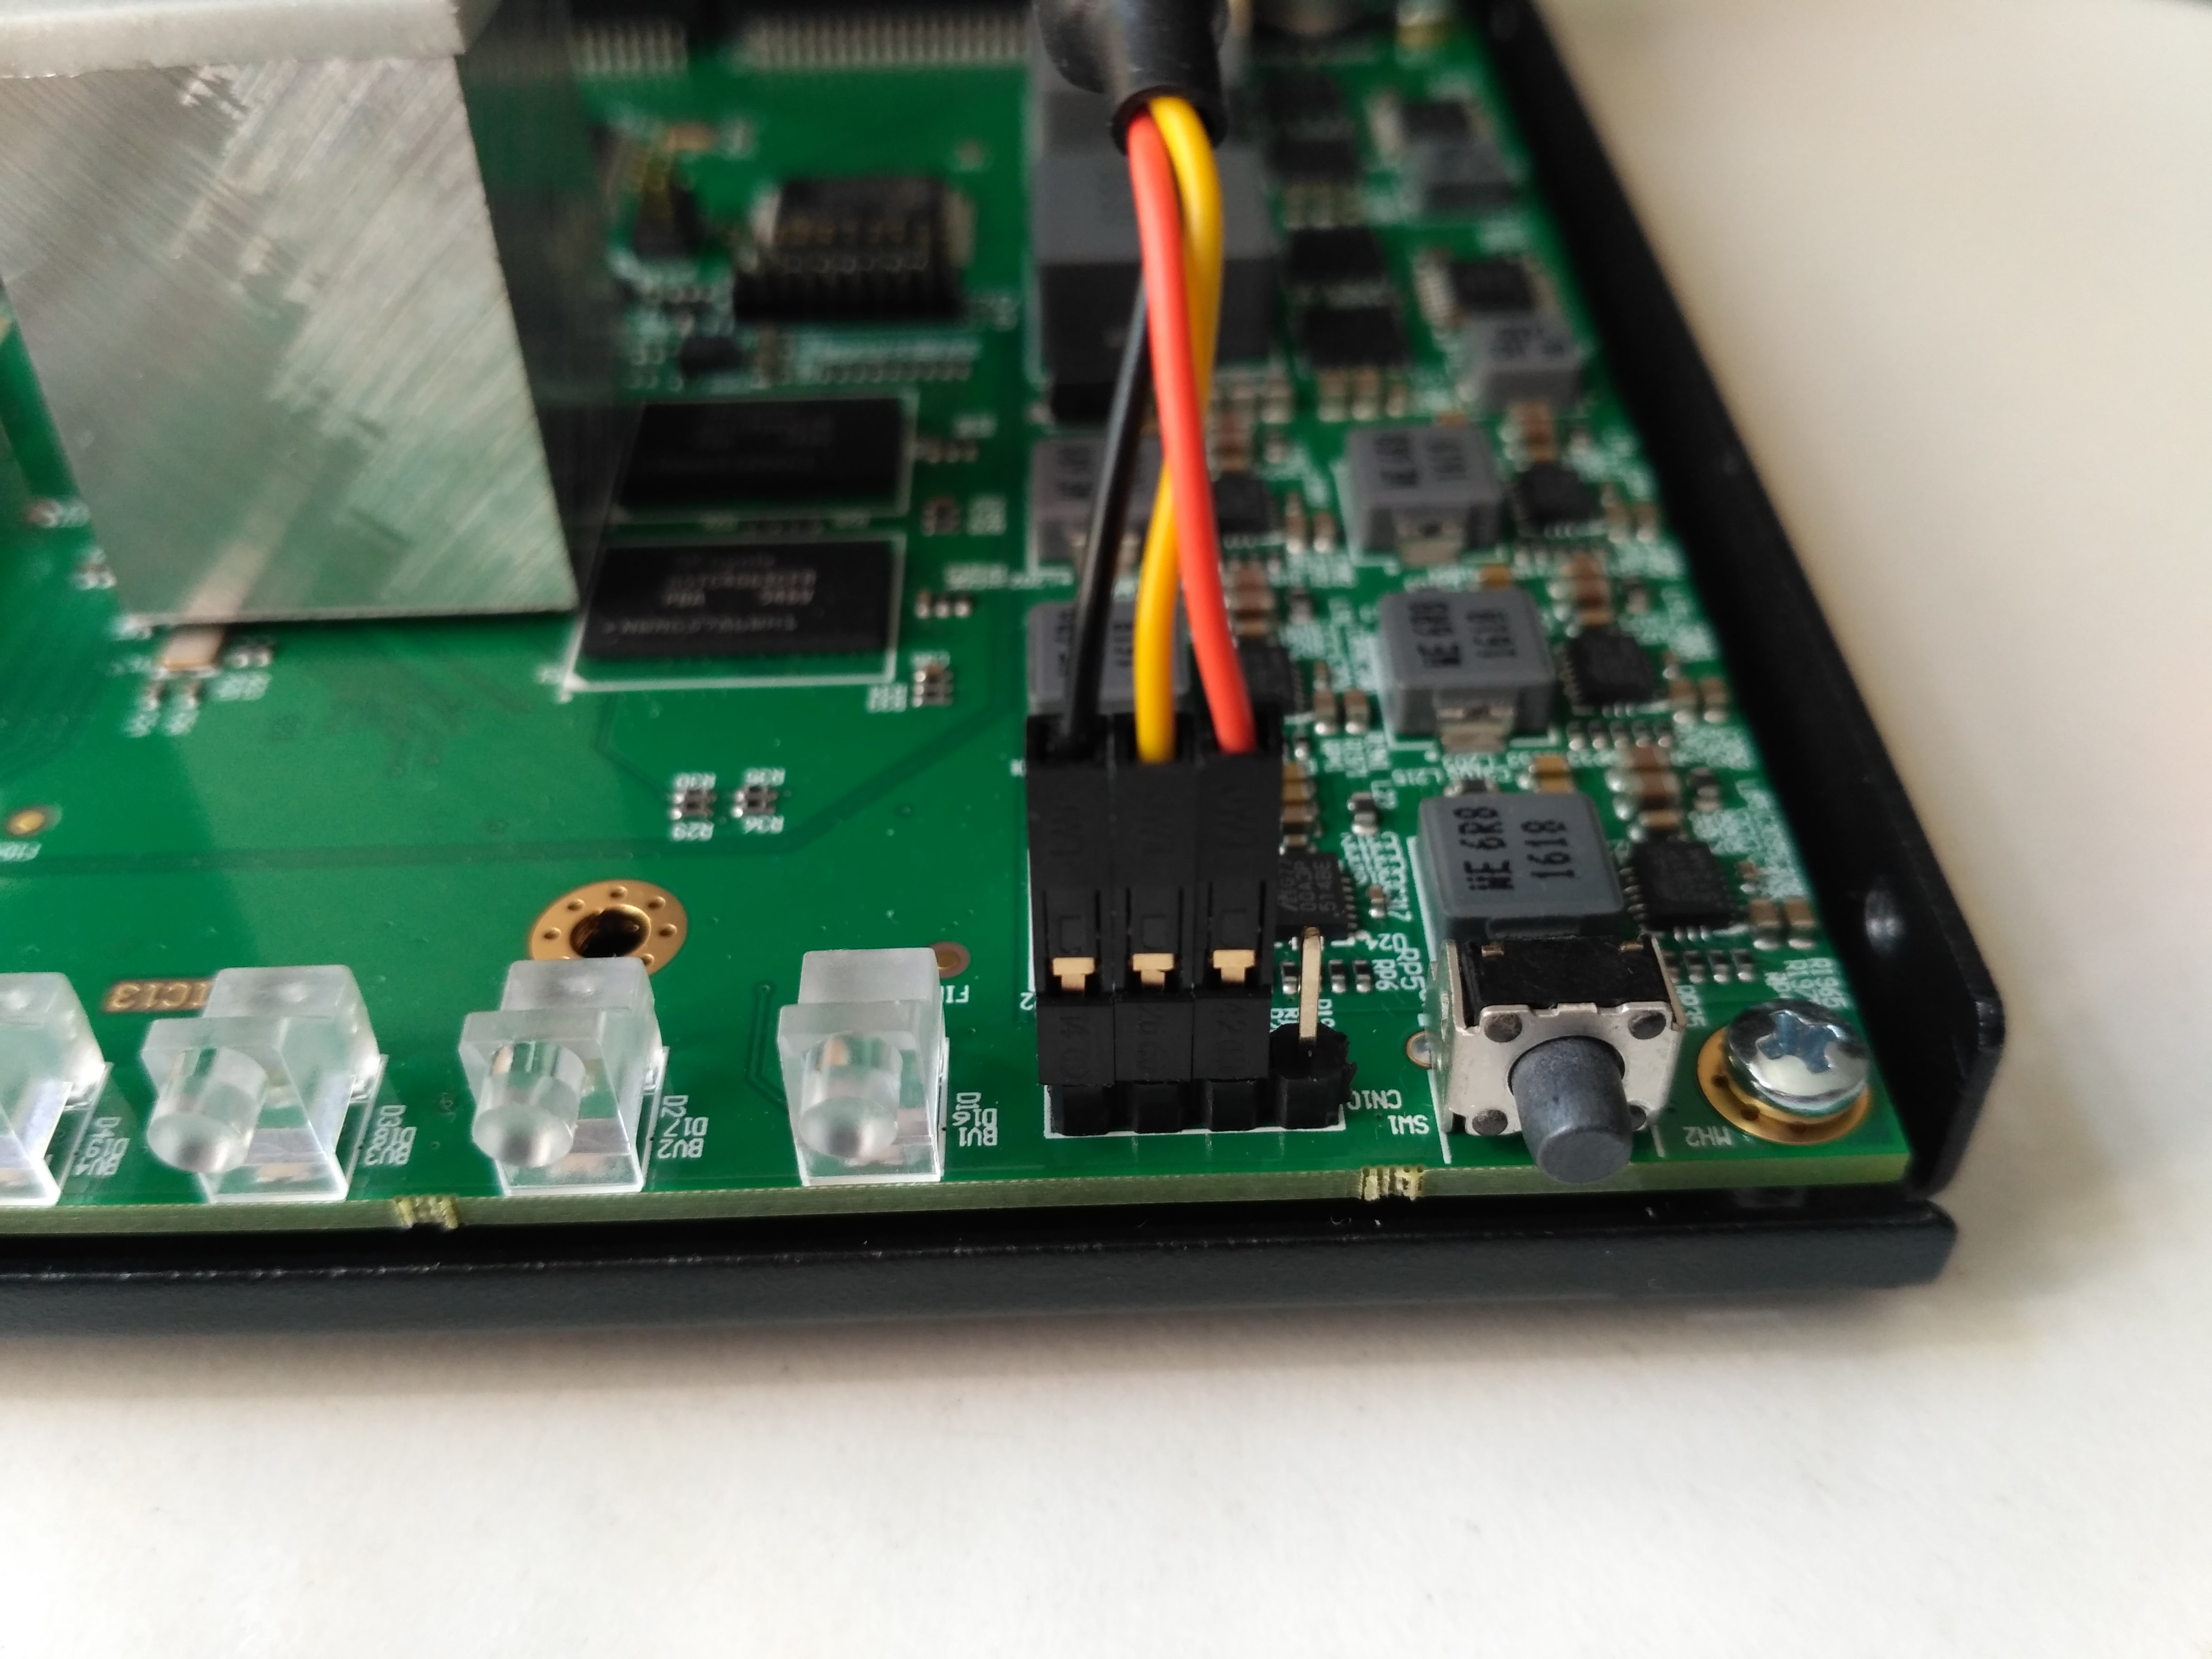
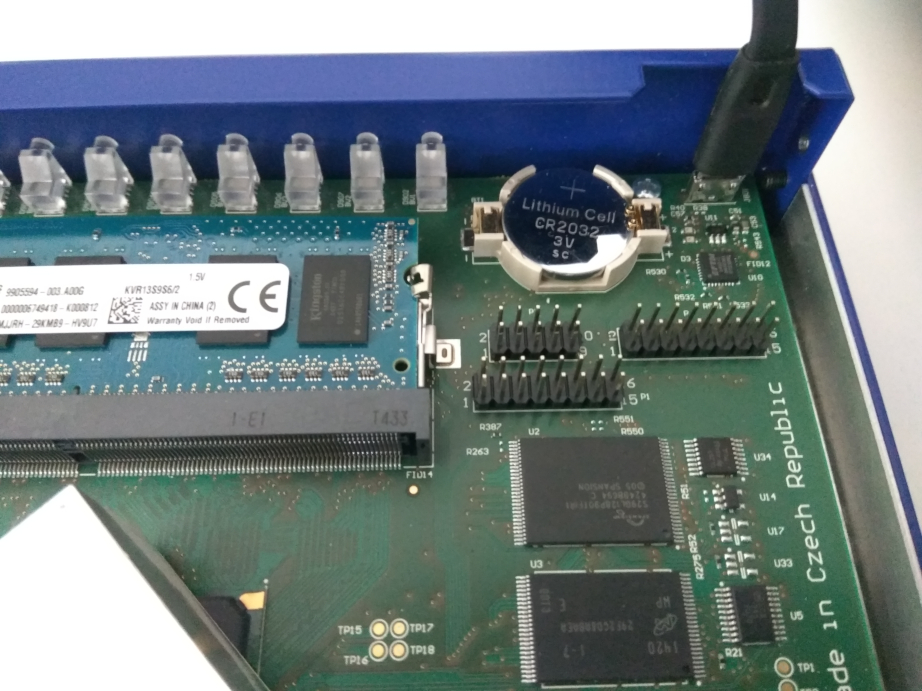
Turris Omnia⚓︎
To access the serial link you need to remove the top cover. To do it, first you have to unscrew 6 screws (3 on each side of the router). The serial pins are in the right bottom corner of the board, between the right most LED and the LED control button. Connect it to you PC using a USB TTL serial adapter as shown on the photo – from the left the colors of the pins should be black (GND), yellow (RX), orange (TX). The specific cable used in this manual is the Raspberry Pi Cable, TTL-232R-RPI.
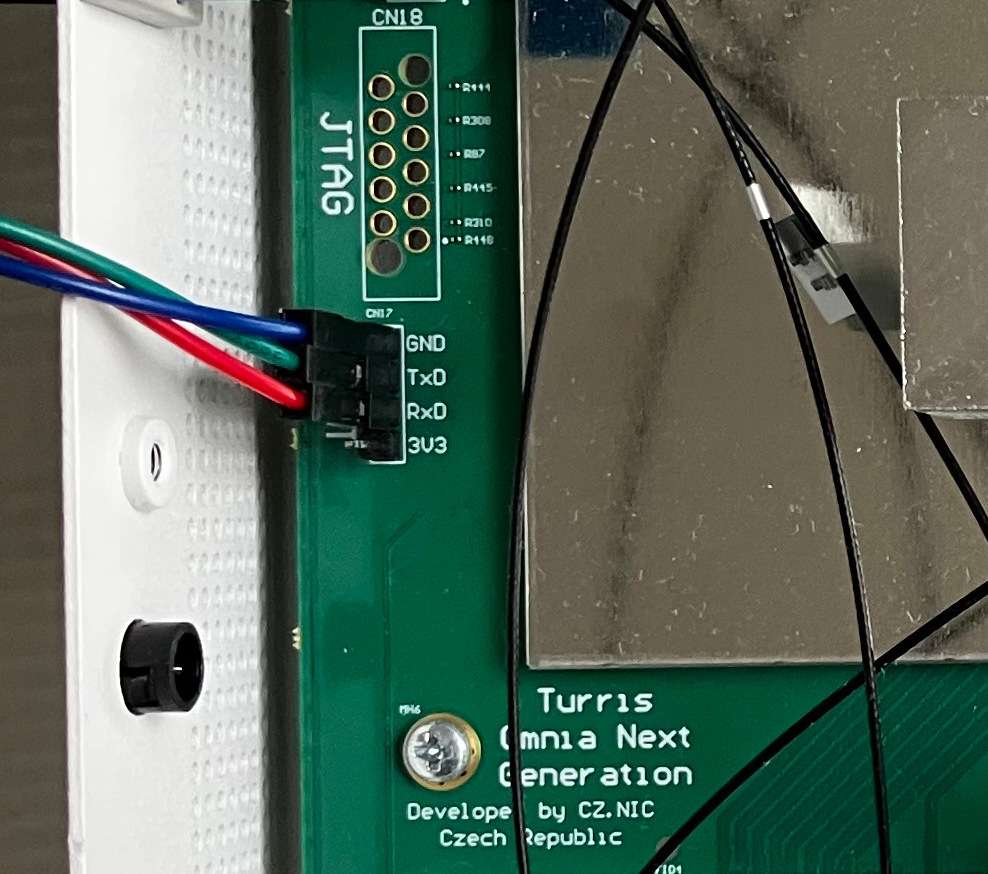
Turris Omnia NG⚓︎
To access the serial link, you need to remove the top cover by unscrewing 6 screws (3 on each side of the router), removing the D-pad button by carefully pulling it out, and lifting the top cover first at the rear part of the device and sliding it out towards the front to avoid the D-pad stick at the front. The serial pins are in the middle of the left side of the board, right next to the CPU and RAM cover. Connect the USB TTL serial adapter as shown in the picture – from top to bottom, the colors of the pins should be black (GND), green (RX), and red (TX).
Turris 1.X⚓︎
Turris 1.0 and 1.1 have the easiest access to the serial port. They already have micro USB connector on board on the left front side. You still need to remove the cover to get access to it, but afterward, all you need is to connect a micro USB cable and you are ready.
Software⚓︎
UNIX⚓︎
In case of UNIX-like systems you can use screen or minicom to connect to your device.
In general, you need to figure out the name of your USB serial port – in case of Linux it is usually /dev/ttyUSB0, but if you already had some serial device (modem, some development board, …) it might be even higher number. It should show up in dmesg after connecting the cable.
To be able to connect to it, you will also need enough rights. Depending on your system configuration, you might need to add yourself to some group and logout/login or setup some udev rules. Another option is to try it as root, which is not recommended but will most likely work.
To connect to the serial port, simply type in your terminal following commands:
Tip
If your serial port is not /dev/ttyUSB0 or /dev/cu.usbserial-FTFMEY40, replace it with the correct path.
screen⚓︎
screen /dev/ttyUSB0 115200
minicom⚓︎
For example, in case of macOS:
minicom -D /dev/cu.usbserial-FTFMEY40 -b 115200
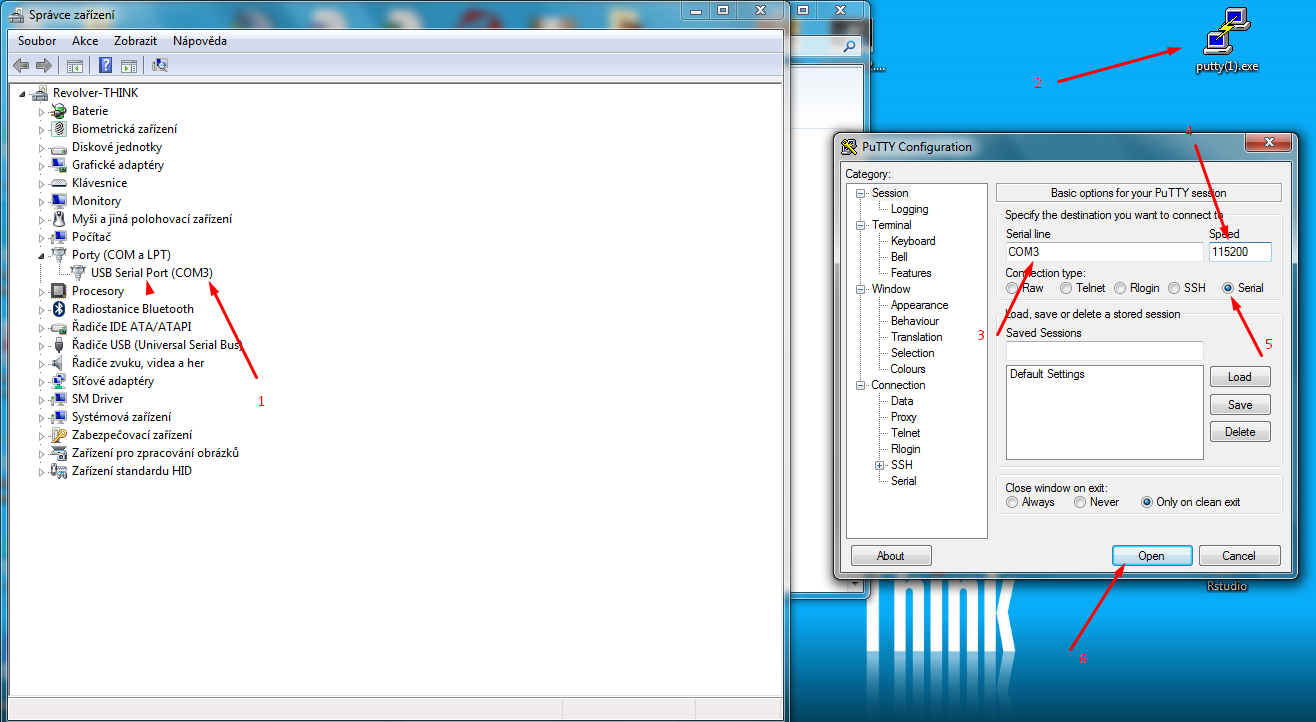
MS Windows⚓︎
On MS Windows, you can use PuTTY to access the serial port. See the following screenshot for details.
Using it⚓︎
When successfully connected, you’ll see empty black screen. Only after pressing enter, you’ll get announcement that you are on Turris router and you’ll get shell prompt.
You are now root on your device and you can do whatever you like and you don’t have to be afraid of loosing control when misconfiguring network.
Few notes. Applications might not get your terminal size, so graphical applications like Midnight Commander or Top might look bad. Also when disconnecting serial cable, your prompt stays in the state you left it in, so programs keep running and if you left running some long time running task, it will be there when you reconnect the serial cable so enter will not get you prompt, but you might need to kill the application first (for example by using Ctrl+C).